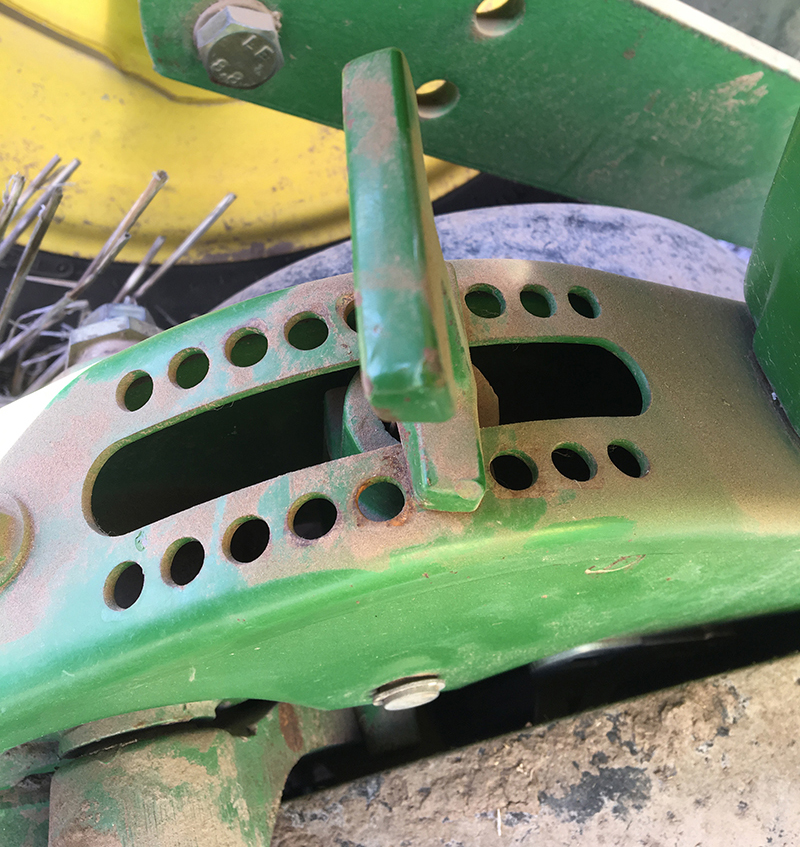
If you have new blades on a Deere planter with the depth mechanism set as shown in this photo, the furrow being cut should be 2” deep consistently. If it’s less than that, you don’t have enough downforce on the row unit. (For corn, sunflowers, and cotton, the seed depth needs to be very consistent, and not less than 2” for corn. For soybeans, there’s no minimum depth for healthy plant development, and they’re not as fussy about being exactly at the same growth stage as their neighbors down the row.)
If you’re not using new blades, you can get some idea by measuring how much down you are on the blade radius (e.g., down 1/4” on diameter is down 1/8” on radius, so furrow should be 1-7/8” deep with the mechanism set as in the photo).
For other brands of planters or drills if you don’t know what the furrow depth should be for a particular setting, take them across a soft spot going somewhat slow, and measure how deep the furrow cut is (tie up the closing wheels, or measure the furrow just behind the gauge wheels before the closing wheels have altered it). Measure from the bottom of the furrow to the original soil line. Then go out across the harder, drier and/or more eroded areas of the field at the fastest ground speed you’ll be planting. Is the depth of cut the same as in the soft area? How about in the combine tracks? I’m not talking how deep the seed is, in case there are issues with it getting to the bottom of the furrow, which is a separate investigation. Right now, as a preliminary matter, we’re just looking at whether the opener is holding depth or not.
Be sure to use the tractor that’ll actually pull the planter during the planting season, not a surrogate, and be sure the tire inflation pressure is properly adjusted, since this can affect the tilt of the tractor and the drawbar’s height.
If you’ve got the spring pressure already cranked up to the max on the downforce for the parallel link on planters, check again if the planter is slightly nose-down. Or if it’s merely level, can you get it a few degrees nose-up? When slightly nose-up, the better the seed placement and the more pressure those downforce springs will exert on the opener’s linkage (up until they start lifting the toolbar, which is another matter to address).
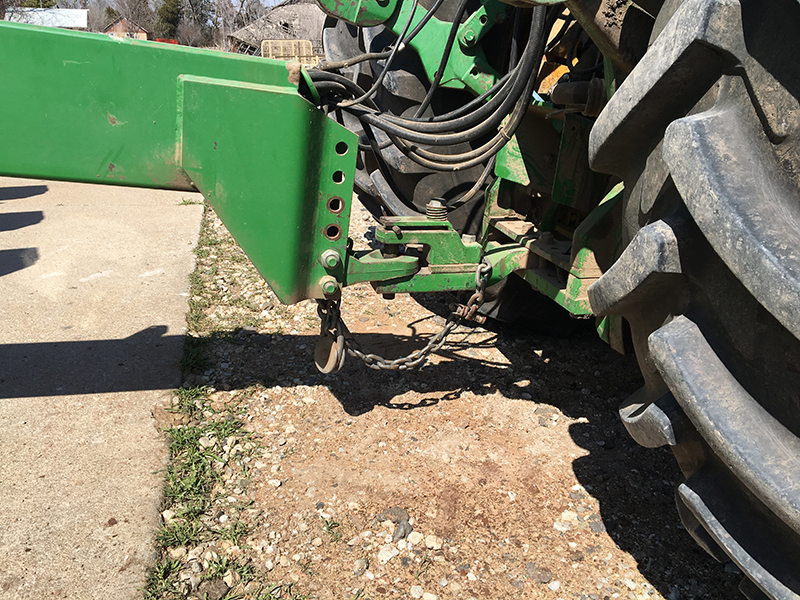
For planters pulled from a drawbar (rather than a 2-point), there’s often some adjustment holes to raise the planter tongue to get the row units more level to nose-up. After you exhaust those, the next step is to either flip the tractor drawbar over (making the drawbar’s S go up instead of down—the opposite of what’s shown in the photo), or weld on some extensions to those plates on the planter tongue with another set or two of holes.

You don’t want excess down-pressure either, so if it has rained or you’ve moved to a more mellow field, always check to see if you can get by with less pressure by repeating this process—you already know what the furrow depth should be based on the previous investigation, so all you need to do is try running a lighter downforce setting and see if the furrow gets shallower in the tougher parts of the field.
In long-term no-till in the poorer soils of the southern USA, and/or when it gets dry, downforce requirement easily exceeds what air bags can supply. Those need helper springs, as described in a previous newsletter. Even the JD & AGCO White heavy-duty downforce springs may need helper springs in some cases, although far more rarely than air bags. Many planters will need extra ballast on the toolbar when transferring this much force onto the row units. (Another option is to put extra weight onto the row unit itself, although this is quite challenging on many modern planter units that’ve done away with the sheet-metal frames to support insecticide boxes.) If you’re running side-band fertilizer openers, you’ll have even more issues with having enough frame weight and downforce on the seed openers (see previous newsletter on this).
Think you’ve got it all covered with downforce monitoring? Not so fast. Quite often the monitor will tell you all is okay, when it really isn’t. Again, see my past newsletter on this. You need to calibrate what it’s telling you versus what’s really happening. And you’ll need to run at least 80# of margin on many systems including Deere’s to make them work properly in no-till. Some people run 150 – 200# of margin, and I’ve looked at the performance in the field and concur that it’s quite necessary—apparently all the mulch needing to be compressed is the reason.
