A nuanced topic. First, let’s look at gauge wheels on planters, then drills. (Your drill isn’t a true gauge-wheel design? Maybe it’s time to upgrade).
For the last 40+ yrs, virtually all planters have had gauge wheels alongside the opener blades, and for a reason—that’s very close to where the seed drops, so you get the most precise depth control from that location.
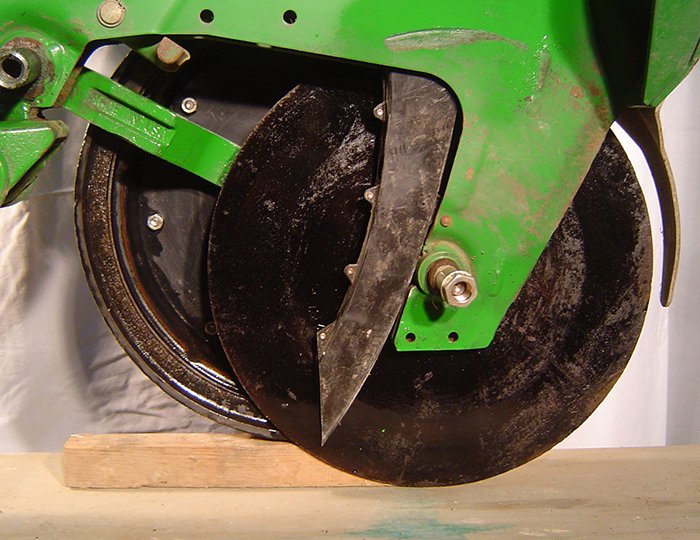
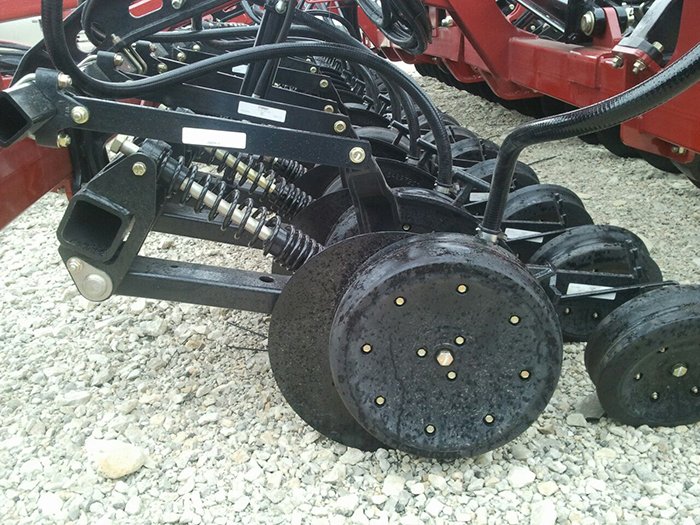
Note the fore/aft location of the gauge wheel on this planter opener. The gauge wheel is resting on what would be the soil exactly where the opener blade is exiting the soil, which provides maximum control in preventing sidewall blowout. There are trade-offs, however.
Locating the gauge wheel alongside the blade also prevents soil from being thrown out of the furrow by the opener blades. If your aim is low-disturbance no-till with the maximum amount of mulch retained, and the least planting of weed seeds, you’ll appreciate this. And when you’re trying to close the furrow, you’ll be happy that the soil hasn’t been thrown too far from where you need it—back over the top of the seed! Plus, if you’re prone to waterlogging, you certainly don’t want to create a depression that will collect water. However, if you often plant in exceptionally dry conditions and need to ‘furrow down’ quite deep to get to moisture by moving a lot of dry soil out of the way, then you won’t like it as much (although it’s possible that your problem is from not growing and preserving enough mulch cover in the first place; perhaps it’s time to revisit your rotations, your harvesting equipment, and anything else that is causing loss of stubble; also, many crop species can emerge from quite deep, so maybe you simply need better tools to reach moisture without bulldozing a lot of soil out of the way [the JD 50/60/90 drill opener isn’t all that great for attempting to seed deeper than 3 inches]; or, perhaps dusting-in the crop is viable in your climate).
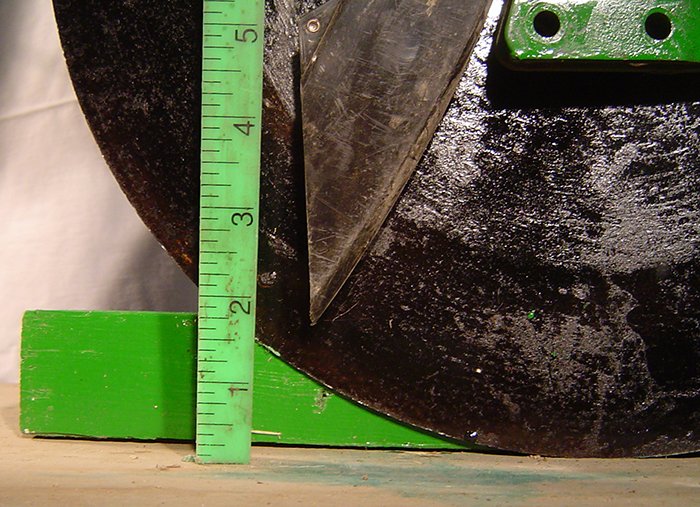
There are other benefits to having the gauge wheel holding down the sidewall from being lifted and torn apart by the opener blade as it rotates up out of the soil—this aids precise seed placement, since the only thing guiding the seed to the bottom of the furrow is the sidewall (look again: the planter seed tube ends 2 inches above the furrow bottom; and the blades have started rotating up before the seed comes to rest).
The drawback of holding the sidewall down while the blade is exiting the soil is slightly more compaction of that sidewall. This is one of those things where you can’t have your cake and eat it too. It’s a trade-off. If you want the absolute least compaction of the sidewall, then you’re going to give up a lot on seed placement precision. Take, for instance, the Case-IH Early Riser opener: Not only does it have the inner relief (Reduced Inner Diameter, or RID) on the gauge wheel to let the sidewall bulge upward while the blade exits the soil, but also the gauge wheel is located very far forward in relation to the blades—this actually is a bigger factor in how much sidewall lift occurs than the RID tires. (The Monosem ‘French’ openers also have this problem, as does the Horsch Maestro). Now, people do grow decent no-till corn crops with Early Riser planters, but they’re usually leaving something on the table for yield because the plant-to-plant uniformity just isn’t there. The reason, of course, is seed placement—there’s just too much variation in depth and seed-to-soil contact.
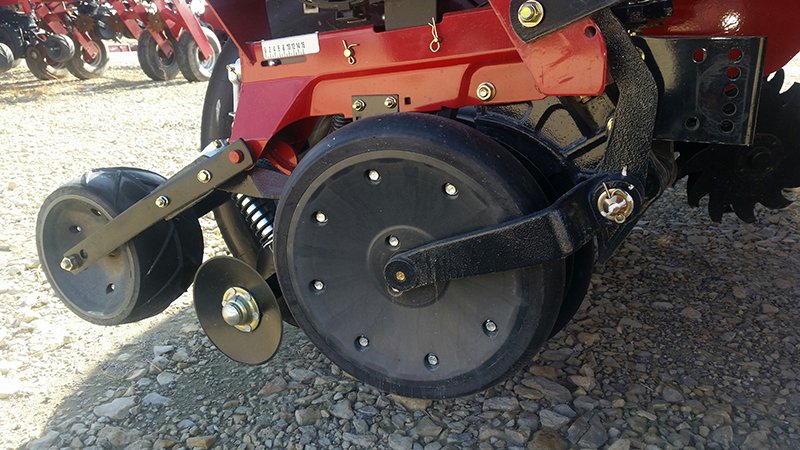
To take this to the extreme, if you’re really serious about minimizing compaction of the sidewall by the gauge wheel, heck, get some really long bolts and spacers and move those gauge wheels out about 5″ from the blades! (You’re never going to have zero compaction of the sidewall, for the simple reason that the opener blades are prying open a furrow—this is compression of the soil, pure and simple. If you take the gauge wheel off completely, sure, the soil will be torn up and will look like it’s not compacted, but it still is—which will be identifiable after the sun bakes the chunks.) And while we’re on the subject of sidewall compaction, let’s not forget one of the worst culprits—the closing wheels, especially smooth closing wheels (OEM rubber tire or beveled cast), or spoked closing wheels that are too thick/wide and blunt like a sheepsfoot that’s used to pack roads. You want spoked closing wheels that are thin/slender and pointy, to chop up the sidewall, not mash it tighter.
Back to gauge wheels: Another factor is whether the gauge wheels are tilted farther out at the top (i.e., gapped away from the blades towards the top), which is a feature long touted by AGCO/White for improved shedding of mud (as well as less compaction of the sidewall closest to the furrow). However, it’s the same downside with sidewall lifting and loss of precise seed placement. (And, for this reason, you’d probably never want RID gauge tires on your White planter, or the sidewall blowout would get rather wild.)
Skinnies or Fatties?
So, for the ideal gauge wheel location, it’s the Deere & Kinze & Harvest International planter openers. Now, which gauge wheel to use? You’ve heard my cautions about RID. What about skinny (~3″) vs wide/standard (~4.5″)? While I love the skinnies on drills (JD 50/60/90 and Case P-500), I’m a bit leery of them on planters—the reason being that they run on both sides of the row, whereas with most of the true no-till drill openers on the market, the gauge wheel only runs on one side (leaving the other side uncompacted). With planters, the compaction being on both sides of the row, so with skinnies the worst of the compaction gets moved that much closer to the row—remember, all of the planter gauge wheels are tipped from vertical, even JD & Kinze (they run in the same plane as the blades, but the blades are gapped apart at the top), so some serious compaction can occur where the outer edge of the gauge wheel runs.
Yes, I realize that skinny gauge wheels are more likely to be within the swath created by the row cleaners, if any are used. There are always trade-offs. If you’re doing corn-on-corn in really heavy stalks, maybe you do need the skinnies. Also, if you’re running fast-acting hydraulic downforce that’s automated, then the concerns with compaction from skinnies isn’t as great.
Gauge Tire: Design & Materials
Next, you’ll need to choose between ‘rubber’ and urethane (hard plastic). The urethane gauge ‘tires’ have tremendous wear-life, no doubt. However, they don’t have any softness to them, so there’s probably more compaction occurring—whether it’s important, we do not know. However, judging from what we’ve learned about machinery tires (radials, low inflation pressures, etc.), it’s quite plausible that the urethane gauge tires (or rubber ones without an air cavity) may be doing some extra damage. Another thing about urethane gauge wheels is that they don’t shed mud as well as the rubber ones. If you’ve got really good soils, high OM, and no infiltration problems, then don’t worry about it and run urethane. Otherwise, maybe urethane isn’t such a good choice.
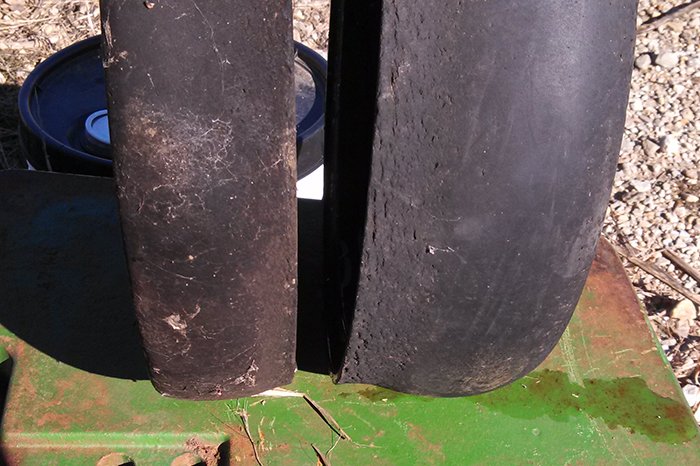
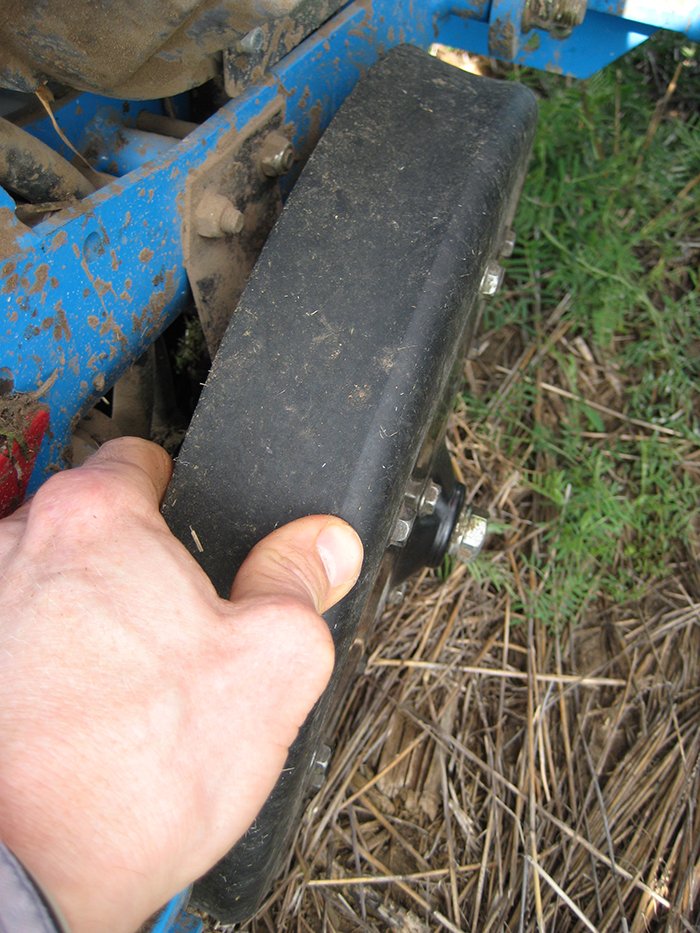
Rubber gauge tires also vary. Most of what are used in USA, Canada, Australia, and Europe are the ‘semi-pneumatic’ type that have a hollow cavity inside. This probably provides some cushion, and lets the tire lengthen to spread over more surface area. This cushioning or softness is far more noticeable on the 4.5″ gauge tires than on the skinnies, some of which are quite hard (push on them with your thumb to get an idea—if you can indent them by ~1/4″ with your thumb, they are semi-pneumatic).
As to the rubber compound, there are differences in density (durometer). Denser tends to stand up to stubble better. However, perhaps the biggest factor in how they wear is how much they’ve cured before seeing action (and soybean stubble is about like running in razor blades). I tell my clients to buy their gauge tires a year in advance and let them cure. Another factor is thickness of the rubber, and we found that MudSmith uses a thicker tire, for 20-80% longer wear life (this newsletter was first published in 2016; we eventually became a dealer for MudSmith in 2018).
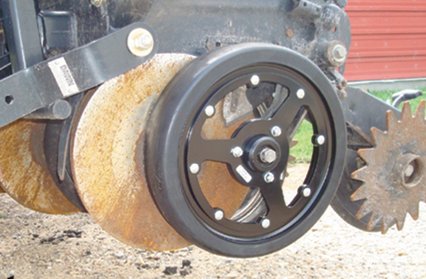
Which brings us to the topic of the rims—standard, or open? The idea with the holes in the rim is so that mud can escape rather than packing tight (and also if you do need to do something with a pressure washer, you don’t have to remove the gauge wheels to get in there). The MudSmiths have worked so well that Deere/Yetter decided to copy them. I guess that’s endorsement enough. ☺️
Drills
There aren’t that many drill opener designs that use true gauge wheels, but they’re getting more common (see our newsletter on Opener Design). The main ones are the JD 50/60/90 series, Case SDX, and Case P-500 / NH P-2080. I already said I like the skinnies on the drills—there’s not so much stubble being flattened, and since all of these drills run short of down-pressure, it’s detrimental to be rolling down more stubble or stalks than necessary and wasting precious downforce (plus, if the wind blows, you don’t want everything rolled flat; and, the stubble lasts longer if it remains standing).
The position of the gauge wheel is excellent on the JD 50/60/90, as well as on the Case P-500. The SDX has issues—there’s a lot of sidewall blowout because the gauge wheel is: 1) located much too far rearward, 2) it’s an RID tire, plus, 3) it’s gapped away from the blade at the top. Going to a skinny, non-RID gauge wheel would help the SDX somewhat, but really the design flaws run deep and are not easily corrected.
To wrap up the comments on drill opener gauge wheel position, note that the JD 50/60/90 has the blade & gauge wheel tilted from vertical, so the gauge wheel again rides mostly on the outer edge like it does on the planters. In contrast, the Case P-500 has the blade oriented truly vertical, so the gauge wheel runs equally on both the inner and outer edges. There are a lot of really nice features on the Case P-500; too bad they forgot to include a seed-lock wheel, though—that omission can cause stand failures.

