For those who don’t know my history, I’ve been an agronomist (independent crop consultant) for nearly a quarter-century now, working almost exclusively with no-till systems during that time. So, first and foremost I’m an agronomist. I only started working on seeding equipment for no-till because of a severe lack of progress in that department–in Kansas, it was clearly the weakest link in our no-till adoption.
Keep this in mind: we at Exapta first decide what needs to be done to provide better crop seedling establishment, then design equipment to fulfill that need. Unlike some companies who first come up with some gadget, and then invent some story to make it sound like it’s a good idea agronomically.
Why use pop-up fertilizers?
Faster early growth of the crop is a good reason: Even if it doesn’t translate into a yield advantage, a faster-growing crop helps tremendously with weed control. In areas with short growing seasons, pop-up can translate into faster dry downs in the fall. And for crops that need to reach a certain stage before winter sets in (e.g., winter wheat), that extra early growth can have enormous yield consequences.
Pop-up fertilizers are also a good way to get nutrients below the soil surface, since you’re making a furrow for the seed anyway. Sub-surface guarantees the roots will have access to those nutrients, without relying on a rain. And sub-surface is environmentally friendly, especially for P fertilizers, since it ensures they won’t be carried away when water runs off the field.
Is pop-up required to grow no-till crops? No, but make sure your soil levels of P and micronutrients aren’t dangerously low if you decide to skip the pop-up. Also, if you plant spring crops somewhat later into warmer soils, there’s perhaps little to no need for pop-up, but the exact answer may still depend on the level of available soil nutrients. The main reason to use pop-up fertilizer is to give a helping hand to young seedlings starting their growth under stress (cold, damp soil).
Pop-up fertilizer materials
The most commonly used are 10-34-0 liquid, and either MAP (11-52-0) or DAP (18-46-0) for dry. (For overseas readers: In the USA, the P number is expressed as P2O5, not elemental P; a weird practice, but you’ve probably come to expect that from us Yankees.) Especially for corn, it is common to add a zinc product, such as ammoniated zinc, to the 10-34-0. It is also easy to add other micros, such as Cu or Mn since 10-34-0 is a liquid. (Avoid using B in the seed row, since it’s so easily toxic.) Never, ever, use a thiosulfate product in the seed row–much too toxic to seeds and seedlings, regardless of rate (there’s no safe rate, not even for wheat).
What about liquid products high in orthophos, low-salt, aka ‘food-grade’?
Well, 10-34-0 does contain some orthophos, and that’s immediately available—not that the seedling needs much right away, since there’s quite high P levels in the seed (the seed carries its own starter-kit of P inside itself). And polyphos converts to orthophos within a few days in the soil anyway. As far as the crop is concerned, there’s really no difference. What about seed safety? Well, since high orthophos products contain more water per gallon, they will be safer at the same GPA than 10-34-0. But if you match up actual lbs of N & P applied per acre, then the difference in safety disappears (yes, if comparing products containing K, such as 7-21-7, to a premium brand-name liquid that contains K, there can still be some safety difference since the 7-21-7 contains KCl which is more likely to be injurious than the potassium hydroxide that’s typically used to make the brand-name stuff. Even then, the differences in crop safety usually only become noticeable if the soil is very sandy, or peat, or too much pop-up is used). Incidentally, polyphos (10-34-0) is made from orthophos by heating it, which causes the P molecules to link together as steam (water) is driven off; in moist soil, the reverse quickly occurs.
Orthophos presents compatibility issues with micros. You cannot use the more economical forms of Zn, such as ammoniated zinc, with pure orthophos without creating plugging problems due to coagulation and settling/salting out. But polyphos (10-34-0) can easily carry the zinc molecule in ammoniated zinc, so long as you don’t exceed the saturation point (a quart of ammoniated zinc in 4 gallons of 10-34-0 is fine).
What all can be mixed with what gets into a lengthy discussion, so check with your local agronomist or retailer. But if they’re pushing orthophos or some premium, name-brand liquid, it might be because they make bigger margins on that versus 10-34-0. Really, the only reason to ever buy the name-brand liquids is if you are at your wit’s end with low-quality 10-34-0 clogging your system (this really shouldn’t be a problem with line-strainers; I ran custom seeding equipment for many years and just cleaning the fine-mesh screen every morning eliminated 99% of the problems). If in doubt, ‘jar-test’ your proposed mixture and set it aside for a couple of days to find out if any sludge forms.
Liquid N (28, 30 or 32% UAN) can also be used as pop-up, either by itself or as a blend with a P-containing liquid fertilizer, so long as the total salt load is within the limits of what’s safe for that crop, row spacing, and soil conditions. For instance, a popular pop-up for corn is a 50:50 mix of 10-34-0 and 32-0-0, applied at 3 gallons per acre on 30-inch rows.
Liquid sulfur is tricky, since thiosul is so poisonous to the crop until it converts to sulfate and elemental S. All that can be done is liquid AMS (ammonium sulfate), which can’t be hauled very far economically since it’s such a low analysis (8-0-0-9) and has to be made with hot water. However, only small amounts are needed in the pop-up anyway (most of your sulfur needs would be applied some other way, usually when you’re applying the bulk of your N fertilizer). But even if you’re not applying any P whatsoever to the crop, a judicious amount of 8-0-0-9 applied in the seed row can provide significant benefits.
What rates? For no-till corn in 30-inch rows, 5 GPA of 10-34-0 squirted into the furrow (direct seed contact) is usually plenty safe. The exception would be sugar sand, or if the seedbed was quite dry and you were just barely getting the corn seed in adequate moisture anyway. Also, when corn is planted quite late (such as in summer after wheat harvest–a.k.a., double-crop), it’s wise to skip the pop-up altogether. Now, there are certainly plenty of people who run 8 – 10 GPA of 10-34-0 in-furrow on corn in 30-inch rows, but they’re walking too close to the edge, in my opinion.
Of course, if you are planting in rows narrower than 30-inch, you can increase the rate proportionally.
Sorghum tolerates rates similar to corn, unless seed vigor is very poor. Soybeans and sunflowers are much more sensitive to in-furrow fertilizers; 3 GPA is the maximum, and I’m a little squeamish about that rate; if asked to name a safe rate, I usually say ‘none’ for those two crops. Cotton is between soybeans and corn for tolerance; I don’t mind 4 GPA for cotton in 30-inch rows.
Dry materials
It’s less effective to blend micronutrients with MAP or DAP, since you don’t get the dispersion that you do with liquid (dispersion = more feeding sites for roots). The prill or granule is in only one spot in the furrow, rather than mixed into a liquid stream that is squirted along the length of the furrow.
However, there are compounded prills for common micronutrients, such as zinc. An example is Mosaic’s MESZ that has N, P, Zn, and S in every granule. There are various mimics of Mosaic’s MESZ, some of which perform as good or better, and some that are worse.
For wheat or other small grains, it is possible to blend in urea (46-0-0) or prilled AMS to gain some additional N. There’s some concern with biuret, a contaminant in urea, being injurious to seeds, but small amounts of urea in the seed row don’t pose any issues.
S is much easier to apply in-furrow in a dry form. Not only can AMS be used, but also elemental S (0-0-0-90). Elemental S cannot be taken up by plants, but must be converted to sulfate first. This is a microbial process. Be sure the elemental S is adequately micronized for this to occur (if the prills aren’t micronized, it may take several years for the S to become available). Even when elemental S is adequately micronized, and conditions are warm and moist for the requisite microbial activity to proceed, it still takes a couple months for the elemental S to become available — it’s a gradual process, with some becoming available within a week, but getting half the elemental S converted to sulfate might take 6 – 8 wks. But for soybeans planted with an air drill, elemental S in the seed row makes sense. Elemental S is perfectly safe in the seed row, even at 100 lbs/a. It’s inert as far as the seed is concerned.
As to safe rates, it’s generally quite safe to apply 28 – 30 lb of ‘total salt’ per acre in the seed row for small grains on 7.5-inch spacing in no-till with low-disturbance openers such as the JD 50/60/90, Case SDX, or Case P-500 / NH P-2080. ‘Total salt’ is the sum of N, K and Mg. For a 10-inch spacing, the safe rate is proportionately less.
Liquids: Where to inject?
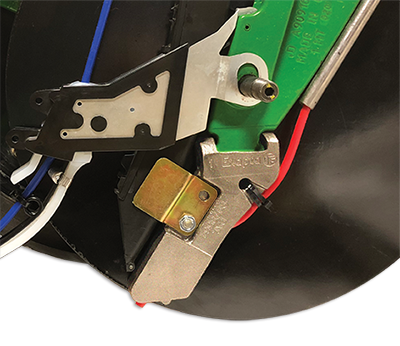
If pop-up is used on planters, nearly all is applied via liquid systems (the exception being the farmers who tow air-carts behind their planters, and blow dry product into the seed row). The two most popular ways to do this are: 1) via the seed-tube guard, which drops the liquid ahead of the seed; or, 2) via a seed-firmer (Keeton or Flo-Rite) or a seed-bounce flap (Rebounder), which drops the liquid on top of the seed. Sometimes, the liquid will be squirted in just ahead of the closing wheels, which again is roughly the same location as a Keeton or Rebounder would do.

There’s also the temptation to put the liquid behind the closing wheels, and at least one study shows that this is at no disadvantage versus in-furrow applications. However, it does need to rain frequently if P fertilizers are going to be as effective on top of the ground over the furrow versus in the furrow. There are too many times when in the furrow is vastly better than on top. I’m not keen on dribbling pop-up on top of the soil.
As to in-furrow, which is better, the fertilizer squirted in before the seed drops, or after? In reality, it isn’t going to make much difference. It’s just a matter of whether the liquid fertilizer coats the bottom of the seed, or the top. There’s at least one study that shows that squirting it in ahead of the seed was much more injurious than squirting it in after the seed had dropped and been firmed with Keetons. It was one year, one location, so who knows if it’s a real concern or not. I really doubt that it matters, either in terms of safety, or plant uptake.
One reason I’m hesitant to heartily endorse applying it ahead of the seed is that it risks gumming up your seed firmer (e.g., Keeton), which I consider essential to getting consistently good stands in no-till. (But Exapta’s Valion guard is a great way to apply liquids ahead of the seed if that’s the route you choose–our Valions place the liquid in exactly the same spot as Totally Tubular guards do, with far better guard longevity, and easier installation.)
Liquid on JD 50/60/90 drills
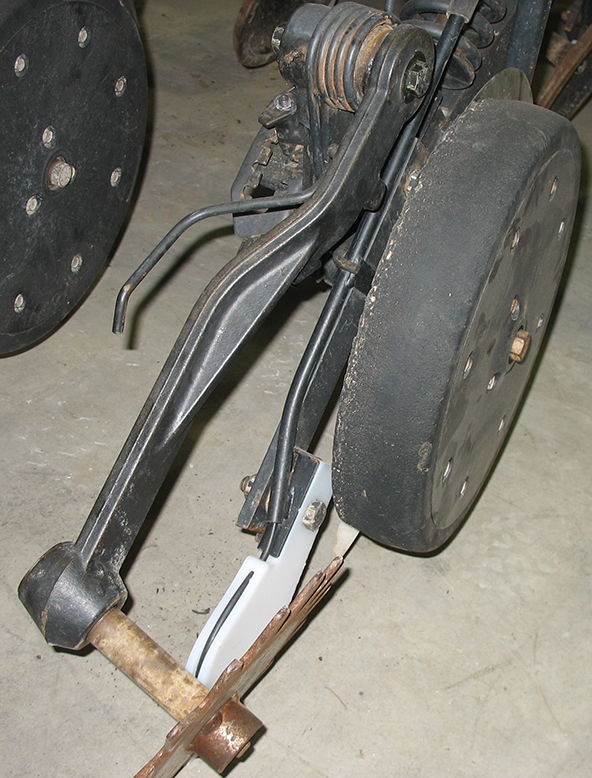
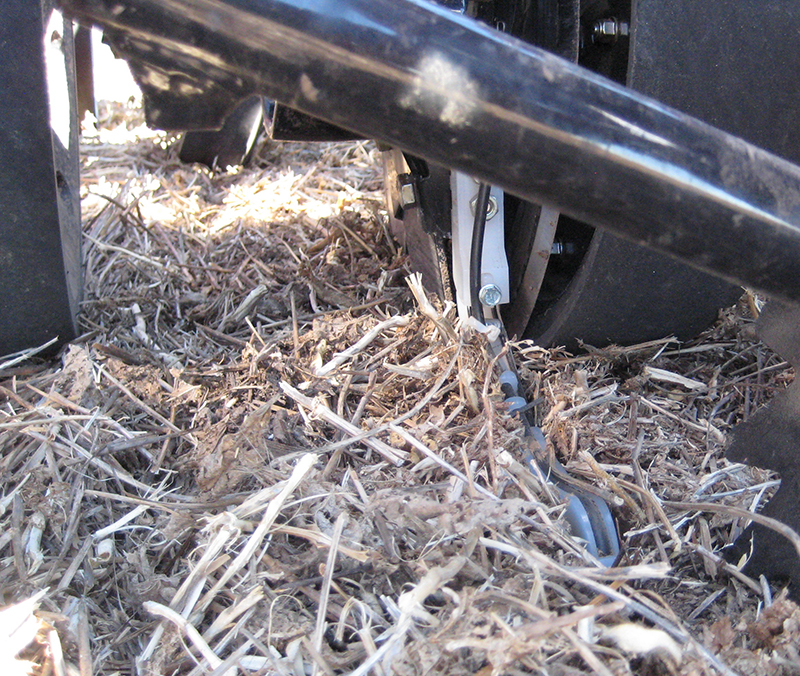
This has always been a compromise. The cleanest system is to apply it with The Fin, a plastic sliding firmer that replaces the seed-lock wheel (but runs on the same arm, so it has lots of pressure). However, The Fin sometimes drags straw and stalks and may not be as good at seed firming as a well-designed seed-lock wheel (such as our DuraLok); also, the Fins wear out rather quickly, and the plastic piece is expensive to replace.

Although there are Keetons to fit onto JD 50/60/90 drills, they are poor for seed firming, since they attach direct to the opener shank and are always changing angles as the opener negotiates the terrain (the opener isn’t on a parallel link, like a planter unit is). If you want a sliding firmer, definitely use The Fin, and not Keetons on these drills. (Even though we sell Keetons and not Fins, we want you to succeed; Keetons are terribly inferior on JD 50/60/90 drills.)
Some kits want you to drill a hole in the top of the seed boot and squirt it in there. In my experience, this is a disaster since it gets fertilizer all over the blade.
Some setups dribble the liquid off the back of the boot (or off the seed bounce flap). The problem here is that these gum up the seed-lock wheel very badly when using sticky liquid fertilizers.
Other companies sell stainless tubes to put the liquid behind the firming wheel, and this is the least-troublesome location. It does splatter all over the closing wheels, however, and may cause them to build up and become very thick and heavy, which compromises their closing action.


Dry product
If you’re delivering dry fertilizer to the seed row, then life is easy. And it doesn’t much matter where it goes, so long as most of it is in the furrow (using safe rates, of course).
In summary
Remember that the primary job of the seeder is to do a good job of seed placement. If fertilizer application at the same time is too much of a distraction, don’t do it. However, there are a number of agronomic advantages to placing a small amount of fertilizer directly into the seed row.
